Article
How to Grow Tomatoes
By Charlie Nardozzi for National Gardening Association
Tomatoes are far and away the most popular vegetable grown by home gardeners. Who can resist the vast array of sizes, shapes, colors, and flavors of hybrid and heirloom tomato varieties? Plus, there's nothing like walking through your garden and munching on your own home grown fruits in the middle of summer.
Tomatoes are a versatile crop. You can grow them in the ground, in containers, or even upside down. The keys to growing tomatoes are choosing the right variety for your location, starting seeds early, keeping the soil warm, moist, and fertile, and supporting taller varieties. Here's a step-by-step guide to growing tomatoes.
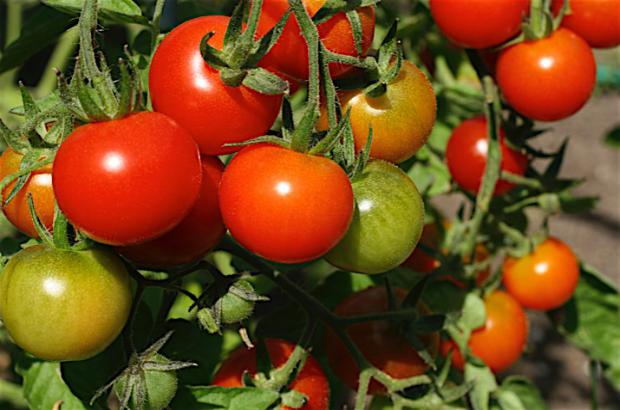
1. Select the variety
There are hundreds of hybrid and heirloom tomato varieties to choose from. Selecting the right one for your garden can be mind boggling. In general, hybrid varieties are more uniform, vigorous, and disease resistant. They grow well almost anywhere in the country. Heirloom varieties offer more variety of fruit shapes, color, and flavor, but sometimes are only regionally adapted. It's best to grow some of each, trying new varieties each year to see which grow best in your climate. Look for seed companies in your area that conduct vegetable trials to see which they ones they recommend.
For containers, choose dwarf varieties such as Patio Hybrid or determinate varieties such as Celebrity Hybrid. Dwarf varieties grow only a few feet tall, while determinate varieties stop growing at about 4 to 5 feet tall. Indeterminate varieties, such as Brandywine, Big Beef Hybrid, and Cherokee Purple, will grow until the weather, insects, diseases, or you stop them. They require the most support but will produce the most fruit. For kids, grow cherry tomatoes, such as Sungold Hybrid, for a sweet and plentiful treat.
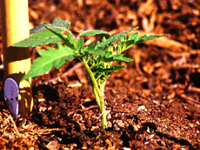
2. Start seeds early indoors
Unless you're buying transplants at the local garden center, you'll need to start your tomato seeds indoors 6 to 8 weeks before the last frost date in your area. Sow seeds in potting soil and keep the seedlings moist and growing under grow lights. Place the grow lights only a few inches from the tops of your plants. The healthiest tomato seedlings are short and stocky when transplanted into the garden. To ensure sturdy seedlings, gently brush your hand over the tops of the plants every day. This will encourage them to develop stronger stems. One week before you're ready to plant them outdoors, harden off the seedlings by moving them outside for 1 to 2 hours a day, gradually increasing the time spent outdoors over a 7 day period until they are able to stay outside overnight.
3. Raise and warm the soil
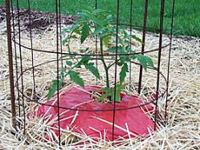
In cooler climates, on all but sandy soils, you may want to create 8- to 10-inch tall raised beds to grow your tomatoes. You can build your own raised beds or buy pre-made ones. Two weeks before transplanting outdoors, cover the beds with red plastic mulch. The color red increases tomato yields by up to 20%. Plus it warms the soil, conserves soil moisture, and prevents weeds from growing. In extreme southern areas, use straw mulch or white plastic instead of red plastic to keep the soil from overheating. If using drop irrigation or soaker hoses to water your plants, lay these hoses under the plastic mulch before laying it down. Amend the soil with a 1- to 2-inch thick layer of compost worked into the soil prior to planting. Based on a soil test, add any other needed nutrients and adjust the pH to between 6.5 and 7.0.
4. Plant
Cut holes in the plastic mulch and plant tomatoes 2- to 3-feet apart in the raised beds. If your seedlings are tall and leggy, bury the stem to the first set of true leaves. Tomatoes have the ability to root along the stem; deeply set plants will be more productive. In containers, mix 3 parts potting soil with 1 part compost and plant one tomato per 5-gallon sized container. Consider using self-watering containers to minimize the amount of watering you'll have to do during the growing season.
For a fun experiment, try growing dwarf or small-fruited, determinate varieties in an upside down container. It's a great way to grow tomatoes on a deck or patio without taking up space. The plants hang down below the container. Keep the container well watered and fertilized.
5. Keep 'em up
Indeterminate tomatoes can grow to be huge plants. Plants trellised off the ground are more productive and have less disease and insect problems on the fruits than plants left to lie on the ground. Use home made or commercial tomato cages, ladders, or stakes to train them off the ground. Dwarf varieties don't need support, but determinate varieties do benefit from being trellised.
6. Fertilize, water and weed
Keep plants well watered, especially when fruit is forming. If the soil moisture fluctuates too much, your fruits may develop blossom end rot (the rotting of the stem end of the fruit). If you haven't used plastic mulch, consider mulching with straw to keep the soil evenly moist. Mulch also prevents weeds from growing. Fertilize monthly with a handful of an organic 5-5-5 fertilizer sprinkled around the base of the plants to keep the plants productive.
7. Control pests
Watch out for a variety of pests on your tomato plants. Tomato hornworms, aphids, whiteflies, and tomato fruitworms are some of the potential pests you may need to control. Diseases such as wilt, virus, and blight can also cause problems. Select disease resistant varieties. Resistant varieties have the letters of the disease they are resistant to after their name, such as V and F for resistance to verticillium and fusarium wilt. Legend Hybrid is a good blight tolerant variety to try.
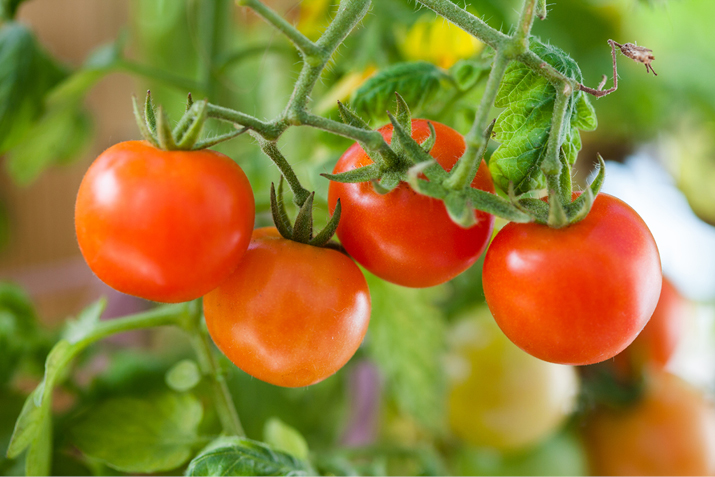
8. Harvest
The more you pick, the more fruits will be produced. Allow the fruits to ripen on the vine to their mature color for the best flavor. Collect mature fruits to can or freeze, preserving the flavor of the harvest into the winter. If you still have many green fruits on your plant at the end of summer, prune off the top the plant and remove newly forming flowers and small fruits. This will send more of the plant’s energy into maturing the remaining fruits. Harvest before a frost. Fruits showing some color will continue ripening after picking if placed in a warm room out of direct light.
You may also like
|
|
 |
 |